Customizations Elements: Image
The Image element is an image that you add to your product design and the customer cannot change. With this element you can, for example, show your base product image, a background or a clip mask.
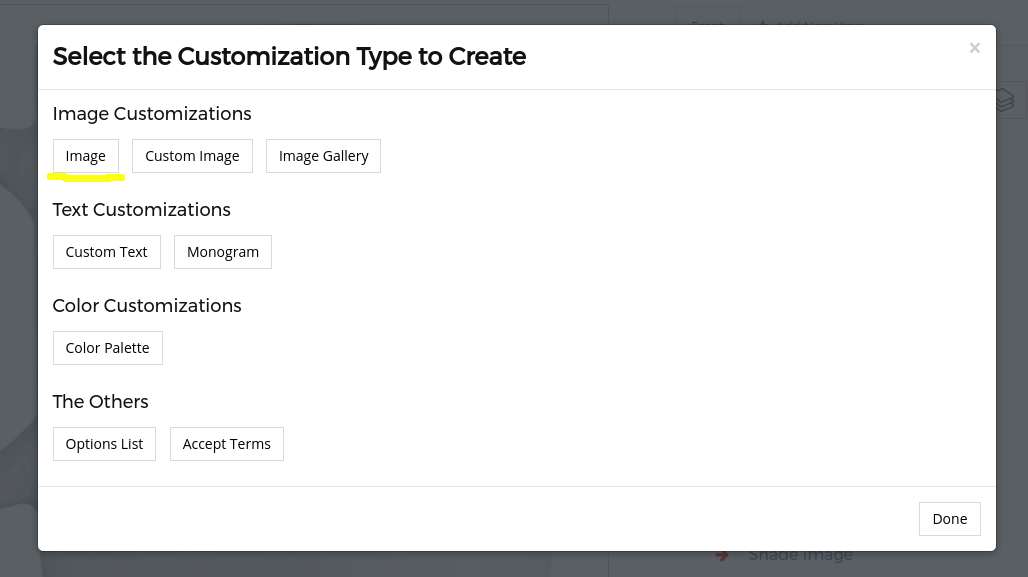
How to add an Image
To add an Image click on the "Add Customization" link or go to the respective layer and click on its "Add Customization" button. In the pop-up window click on the "Image" button.
Settings
To change the Custom Image settings click on the respective customization's item in the Customizations List area. A pop-up will open with the settings options.
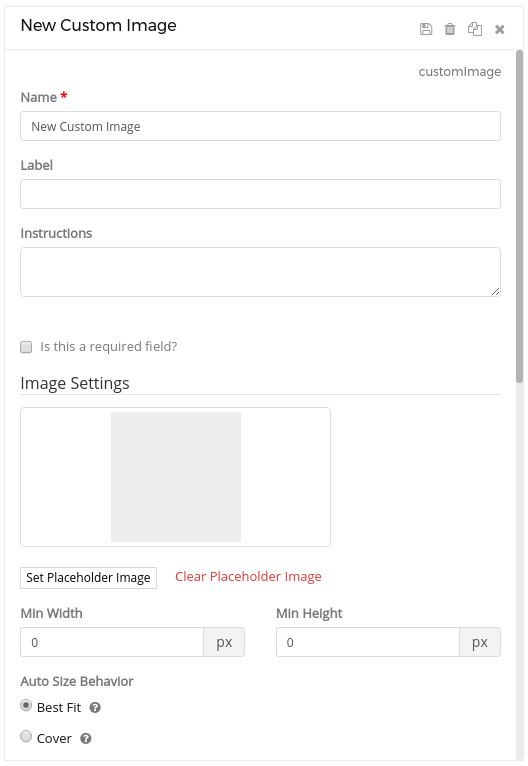
Basic Settings:
Name:
The name or title you want to use for this element. For example: "Background".
Image Settings:
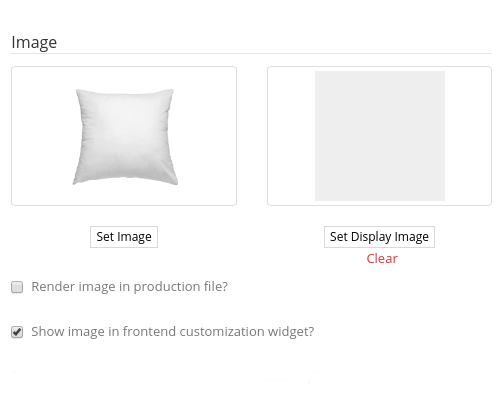
To actually set the image for this element click on the "Set Image" button. This will open a pop-up where you can upload a new image or use an image from your Image Gallery.
You can also click on the "Set Display Image", to add an image that the system will render in the frontend customization widget. The Display Image optionis useful for situations when the image to render in the production files is too large and slows down the loading of the frontend customization widget. In those cases you could use a lower resolution image as Display Image which will load faster than the default Image.
Color Palette Settings:
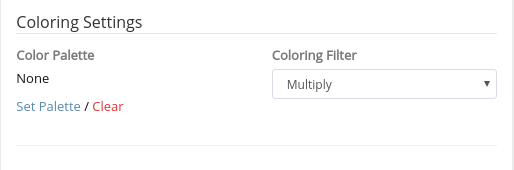
You can make a Static Image element colorable by the customer by connecting it with a Color Palette element. To connect a Static Image with a Color Palette element click on the "Set Color Palette" link. A pop-up window will open where you can click on a Color Palette to select it or you can create a new Color Palette element.

Click here to learn more about Color Palettes.
Filters:
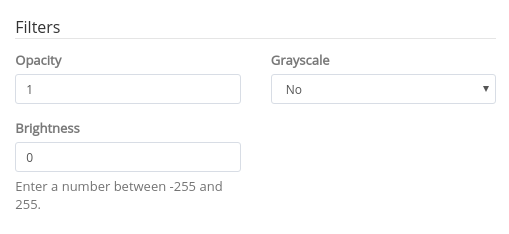
You can use the Filters settings to apply Opacity, Grayscale and Brightness to the Image. The Opacity settings starts at 1 and you can reduce it down to 0 to make the Image transparent.
Position and Dimensions:
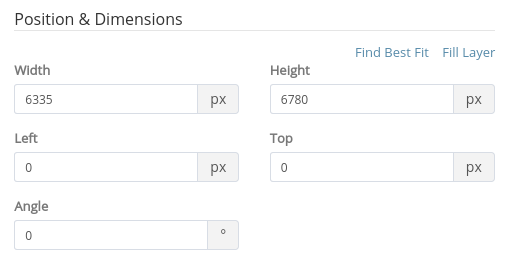
You can enter the Width, Height, Left, Top and Angle values to change the element's dimensions, position or angle / rotation. You can also click on the element in the Graphical Area and move, resize or rotate it. Please remember to click on the element's Save button to apply your changes.
You can also use the "Find Best Fit" link to fit and centralize the image inside its layer. And you can use the "Fill Layer" to fully cover the layer with the image.
User Manipulations:
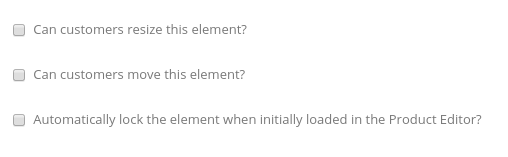
You can use the following settings to determine how the end user can interact with the Image:
"Can user resize this element?" - Check this option if you want to allow customers to resize the element.
"Can user move this element?" - Check this option if you want to allow customers to move the element.
"Can user rotate this element?" - Check this option if you want to allow customers to rotate the element.